
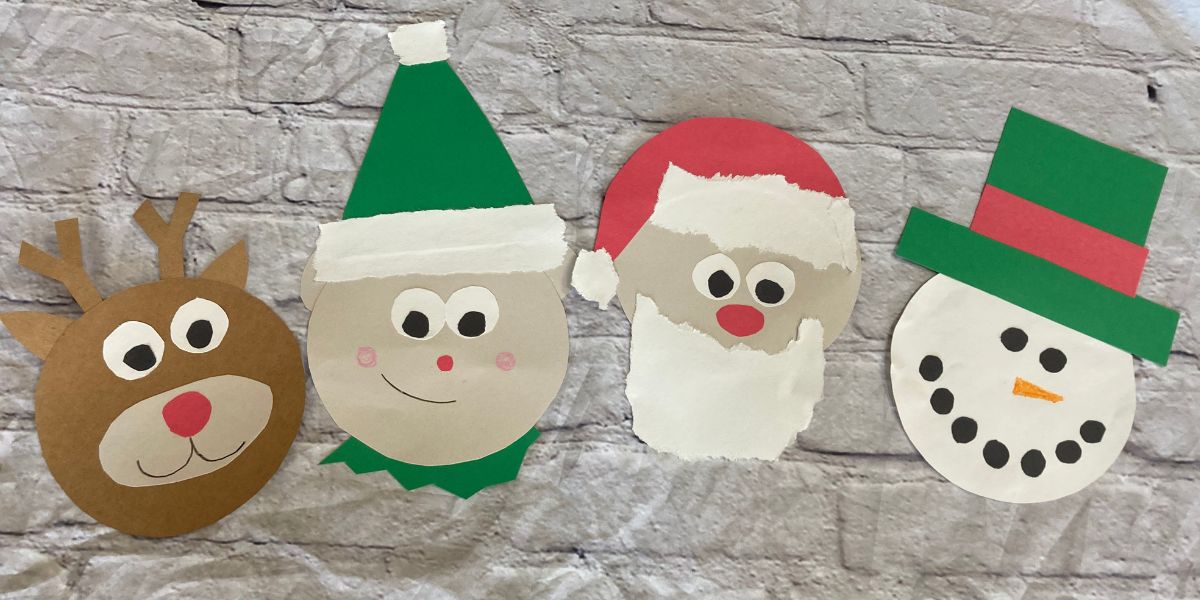
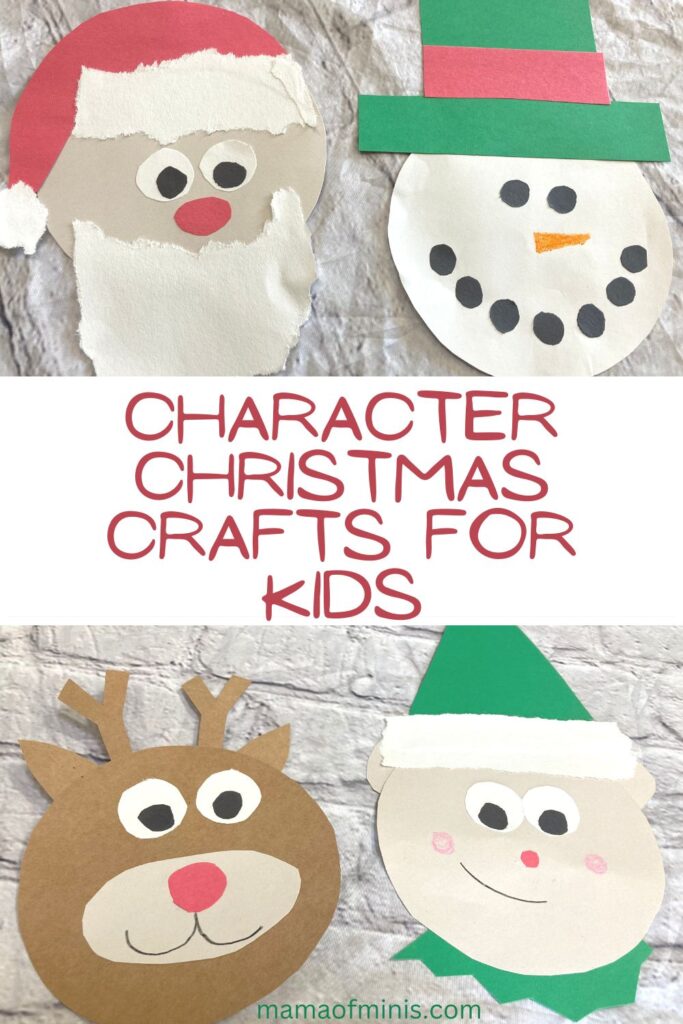
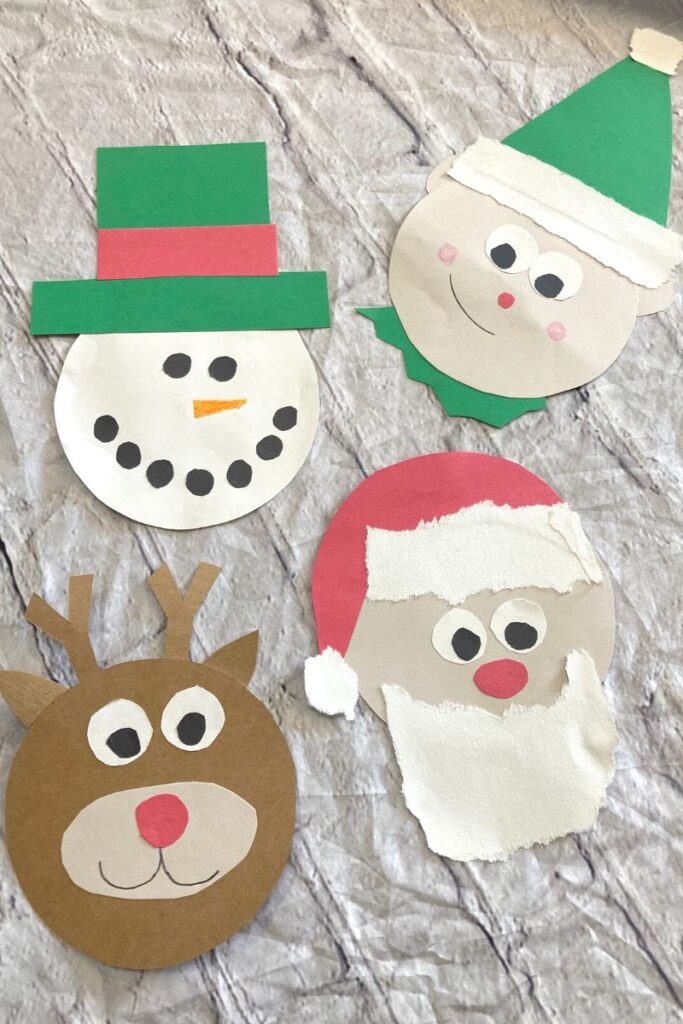
4 Fun Construction Paper Christmas Crafts
These easy construction paper Christmas crafts for kids are the perfect crafts to help celebrate the holidays. Children can learn how to create a reindeer, elf, snowman, and Santa crafts using just paper, scissors, and a glue stick.
These holiday themed crafts for kids are the perfect Christmas character crafts for toddlers, preschoolers, and school-aged children as well. The children can help cut out and create the pieces or the pieces can be prepped by an adult and put together by a child.
Holiday character crafts make for a great decoration to tape up around the home or can also be made into a keepsake for years to come. Simply make the four characters and tape them down onto a white background. Put the background into a frame and you have a fun Christmas picture that is perfect for holiday decorating and using to remember your little one’s crafting skills.
All of these four paper Christmas character crafts start with a cut-out circle as a base. If you are looking for other fun crafts with this same base be sure to also check out these farm animal crafts for kids as well as these arctic animal crafts for kids. The bowl tracing makes a great base for a project and can be customized in so many different ways.
Construction Paper Christmas Crafts
Materials
- Construction Paper
- Scissors
- Glue Stick
- Marker/writing utensil
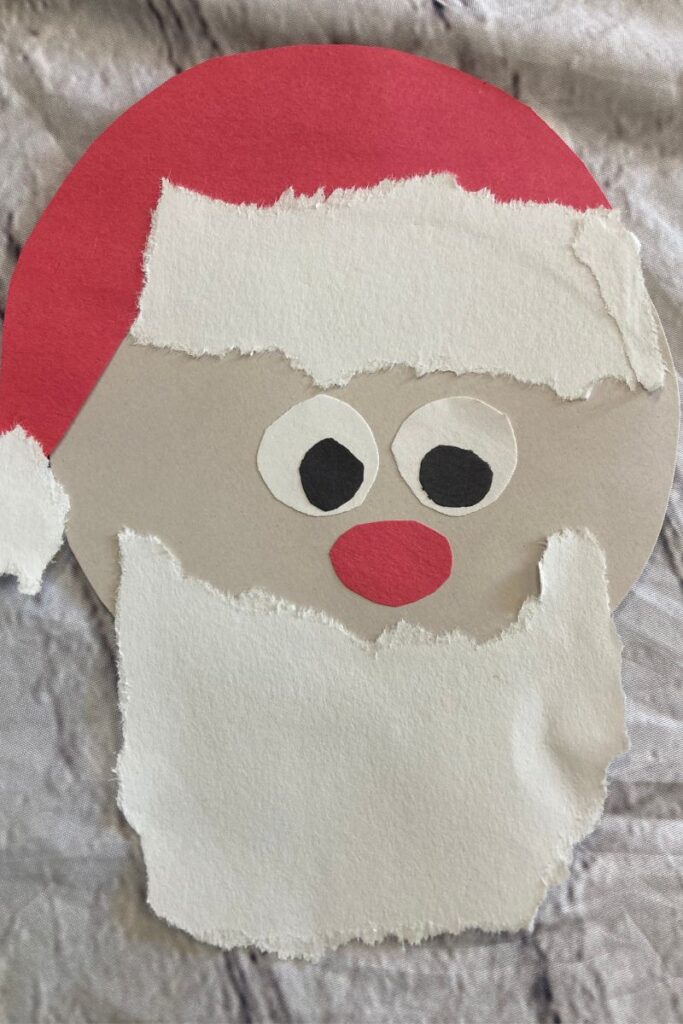
Construction Paper Santa Craft Directions
1. Trace a circle onto a piece of peach, tan, or brown construction paper for Santa’s head and cut it out.
2. Cut out a red semi-circle Santa hat-shaped piece, two 1/2 inch white circles, 2 1/4 inch black circles, and a small red oval for a nose.
3. Rip out a white rectangular piece the size of the bottom of the hat-shaped piece for the fur, a white beard-shaped piece, and a small white circle for the tip of the hat.
4. Glue the hat together and glue it onto the Santa figure.
5. Glue the white and black dots together to make the eyes and glue them just under the fur of the hat. Glue to red nose underneath them.
6. Glue Santa’s ripped-out beard to the bottom of the circle for a completed Santa project.
Construction Paper Snowman Craft Directions
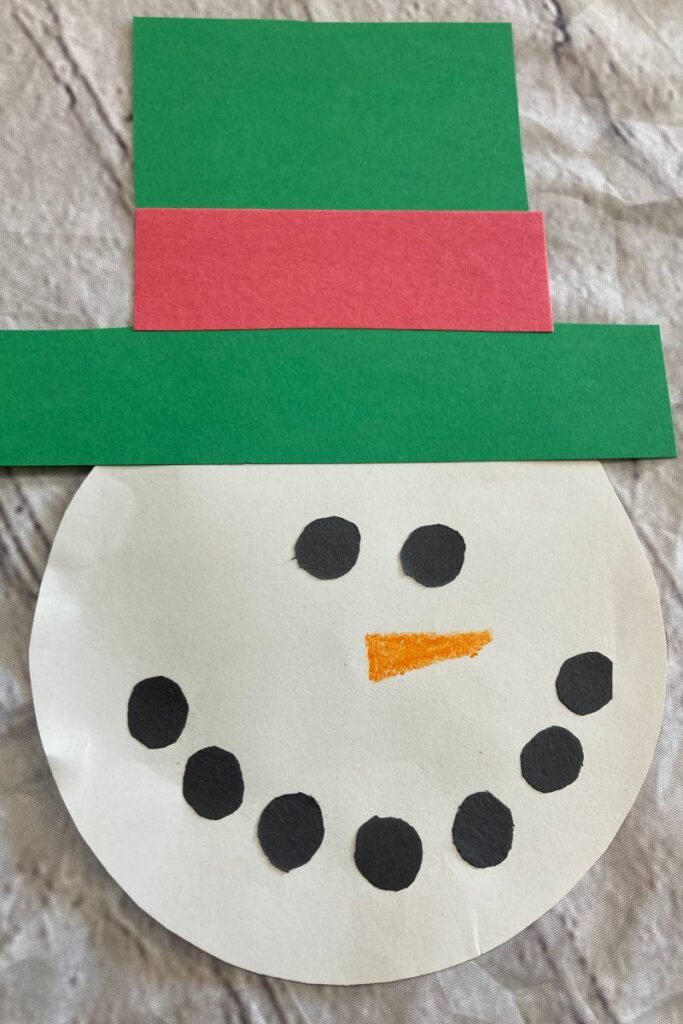
1. Trace a circle onto a piece of white paper for the snowman’s head and cut it out.
2. Cut a rectangle with a brim on it for the snowman’s hat. We prefer green or red but can use any color if desired.
3. Cut out a small rectangle for a decoration for the snowman’s hat. Use a different color than the hat. Glue these together. Glue the snowman’s hat onto the top of the head.
4. Cut out two small black circles for the eyes and 6-8 small black circles for the mouth. Glue these onto the snowman’s head.
5. Cut out a small orange triangle for the snowman’s nose and glue it between the eyes and the mouth.
Construction Paper Reindeer Craft
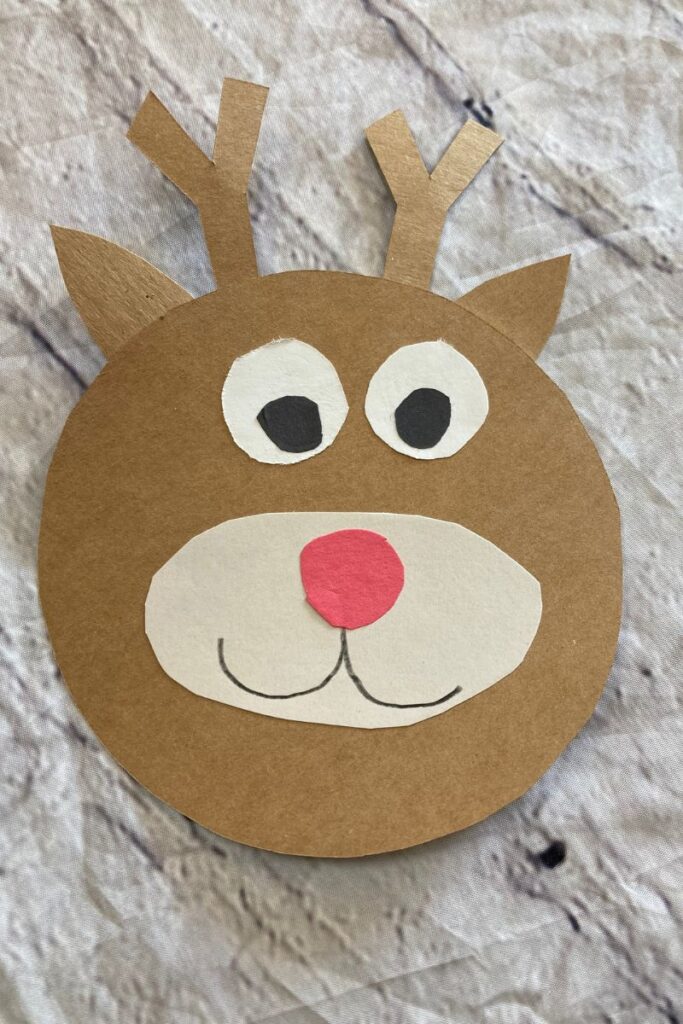
1. Trace a circle onto a piece of brown paper for the reindeer’s head and cut it out.
2. Cut out lines and glue them together in a letter y shape for the reindeer’s antlers. Glue 2 letter y shapes onto the back of the brown circle.
3. Cut out two triangle shapes from brown paper for the ears and glue them to the back of the reindeer’s head on the outside of the antlers.
4.Cut out two 1/2 inch white circles and 2 1/4 inch black circles and glue them together for the eyes. Glue them to the top of the head near the antlers.
5. Cut out a tan or brown oval for the mouth and glue it underneath the eyes.
6. Cut out a small red circle for the nose and glue it onto the mouth oval.
7. Using a black pen or marker draw a mouth coming from underneath the nose.
Construction Paper Elf Craft
1. Cut and trace a circle out of tan or peach-colored paper for the elf’s face.
2. Cut a large green triangle out for the elf’s hat.
3. Rip a white rectangle the size of the bottom of the green triangle for the hat’s fluffy part. Rip a small circle for the top fluffy part of the hat. Glue the pieces together to make the elf’s hat and glue the whole thing to the top of the circle for the head.
4. Cut out two semi-circles for the ears and glue them to the head next to the corners of the hat.
5. Cut out and glue a zig sag semi-circular piece for the elf’s shirt and glue it to the back of the bottom of the circle.
6. Cut out two 1/2-inch white circles and two 1/4-inch black circles and glue them together to make the eyes. Glue them down underneath the hat on the elf’s face.
7. Cut out and glue a very small red circle underneath the eyes to make the nose.
8. Draw a smiling mouth and two circles for the cheeks to complete your elf picture.


These are some really creative craft work. The use of paper to make a Santa Clause is perfect for the upcoming holidays. They are ideal for keeping the kids busy. Thanks for sharing.
Yes, the best for keeping them busy. Thank you so much!
These Christmas crafts for kids are adorable and perfect for adding some holiday cheer. These look like a fun and easy project for little ones, thank you for sharing!
THank you so much. We love Holiday cheer!
These are so cute! This looks like a fun activity to do with my nieces when I’m at their house for Thanksgiving next week.
Thanks so much. I hope they enjoy them!