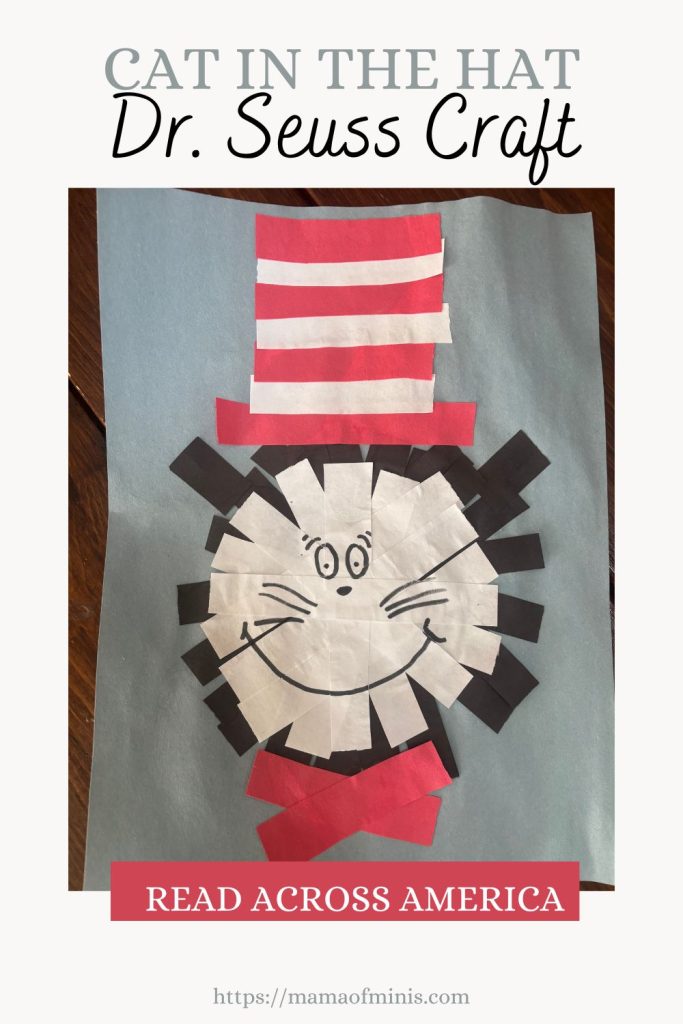
Dr. Seuss Construction Paper Cat in the Hat Craft
This fun and easy Dr. Seuss construction paper Cat in the Hat craft uses paper strips to create a fun Cat in the Hat craft that goes perfectly with the Dr. Seuss storybook classic.
For this craft, you will need scissors, a glue stick, a marker, and red, white, and black construction paper strips. It is perfect for Read Across America week or for a unit of learning about Dr. Seuss and all of the fun storybooks he writes.
For more fun Dr. Seuss themed activities be sure to also check out this cute “Oh The Places You’ll Go” hot air balloon craft or this fun “One Fish Two Fish Red Fish Blue Fish” sensory activity.

Cat in the Hat Craft Tips for Success
*To make this fun Cat in the Hat craft you will need paper strips in red, white, and black, You can prep your paper strips ahead of time for younger children. Older children can cut their paper strips on their own from a piece of construction paper. Your paper strips should be about 1/2 inch thick.
*You can use any color paper desired for the background piece of paper. Feel free to add any details to your completed craft. You can write a Dr. Seuss saying like, “Cat in the Hat,” or “Happy Read Across America Week” at the bottom of the paper.
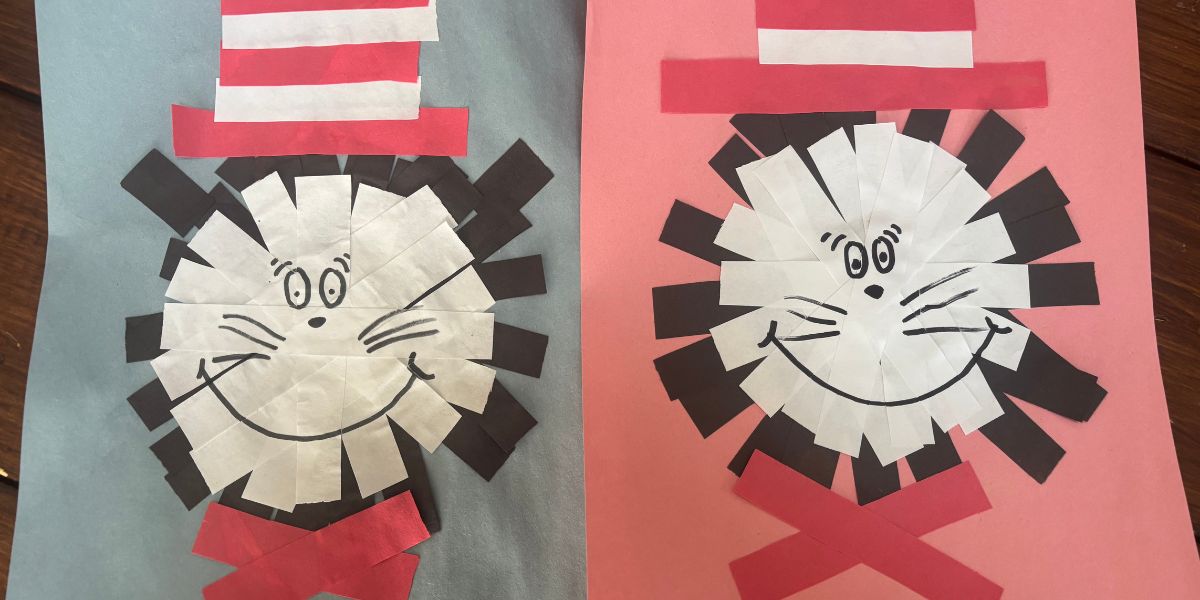
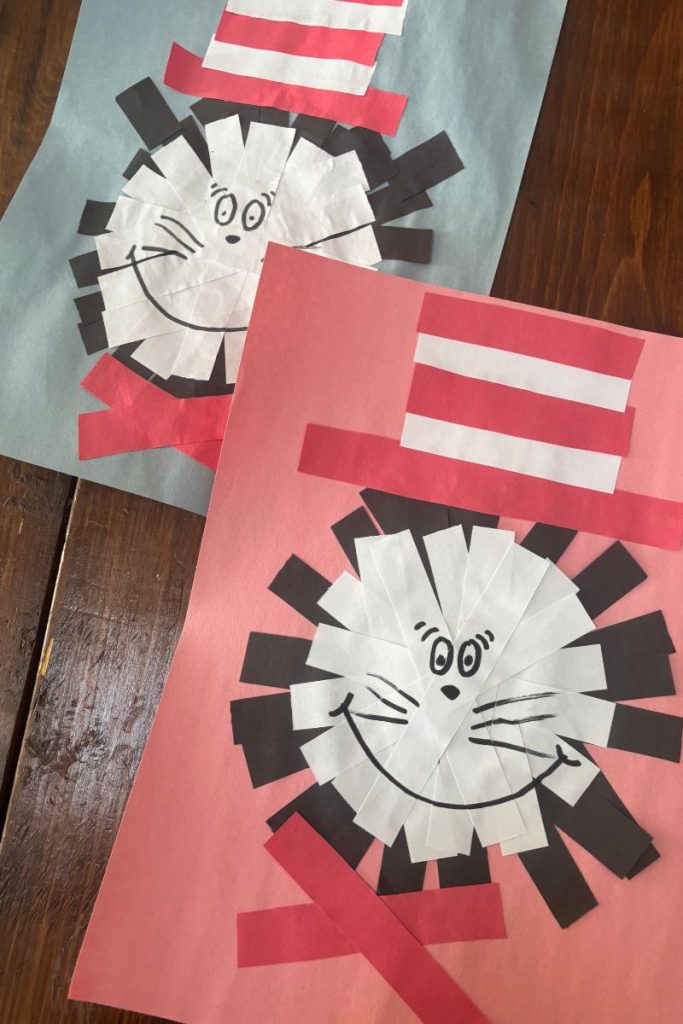
*When making your craft be sure to leave room at the top of your paper for the Cat’s hat. The cat head should be glued down on the bottom third of the paper to leave space for the hat at the top but still have a little space for the bowtie at the bottom.
*You do not need a specific number of paper strips. Just glue down and fill in paper strips until your cat’s face and fur looks filled in. This will take anywhere from 8-12 paper strips depending on how thick you make your strips and how you glue them down.
Cat in the Hat Dr. Seuss Craft
Materials:
- Red, White & Black Construction Paper
- 1 Construction paper piece in color of choice for background
- Scissors
- Glue Stick
- Black marker or crayon
Directions:
- Cut your red, black, and white construction paper into roughly 1/2″ wide strips. Cut your black construction strips down about 1-2″. Cut your white construction paper strips about 1″ shorter than the black construction paper strips.
- Cut one red construction paper strip about the same size as the black ones. Cut the rest of the red paper strips in half.
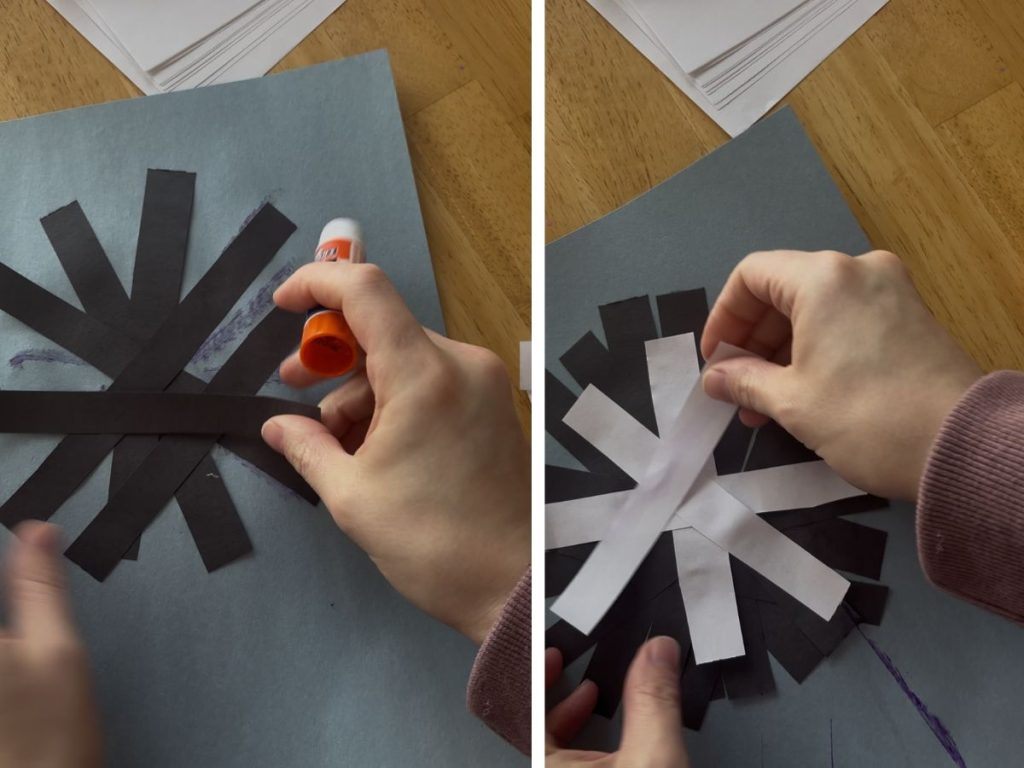
- Put glue on the back of the black construction paper strips and stick them down in a circular pattern towards the bottom third of your background paper. Fill in your black strips of paper until the cat’s fur looks round and full.
- Put glue on the back of the white construction paper strips and stick them down in a circular pattern in the middle of the black construction paper strips to create the cat’s face. Glue strips down until the white fills mostly in.
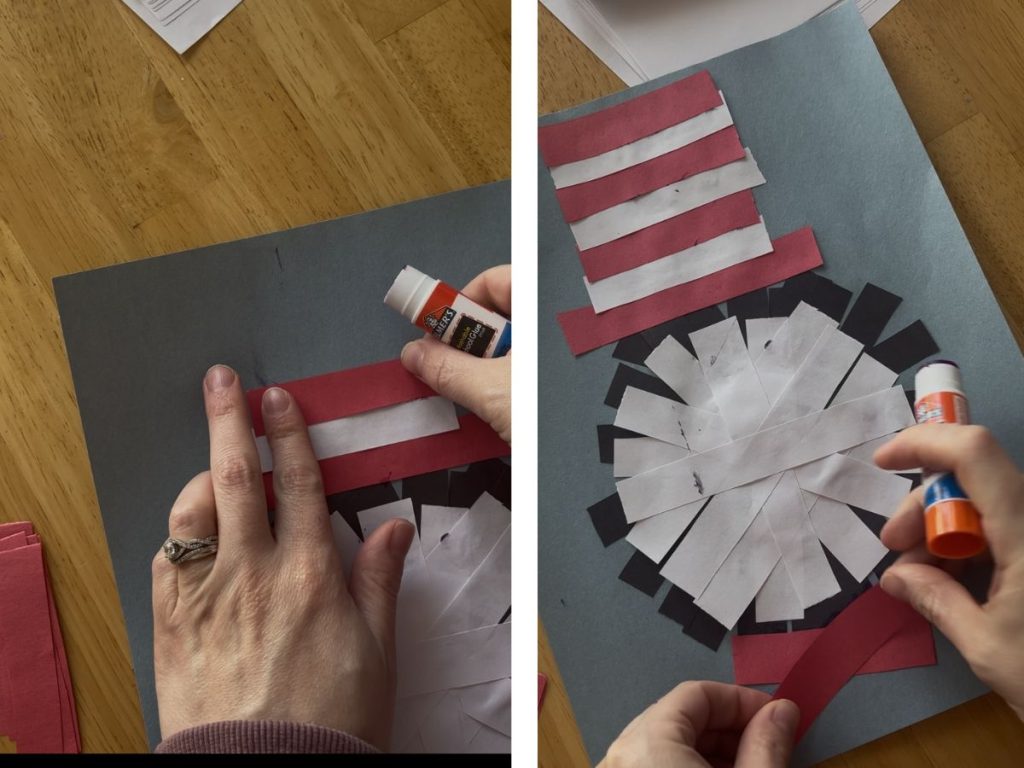
- Glue down your longer red paper strip on the top of the cat’s head towards the emptier part of the background paper. Glue a smaller white strip on top of the middle of the red strip. Continue gluing down red and white strips of the same size until you are near the top of the paper to finish the cat’s hat.
- Glue down two red strips of paper in an x shape where the cat’s neck would be to create your cat’s bowtie.
- With a black marker draw on a mouth, nose, eyes, and whiskers to complete your Cat in the Hat craft.