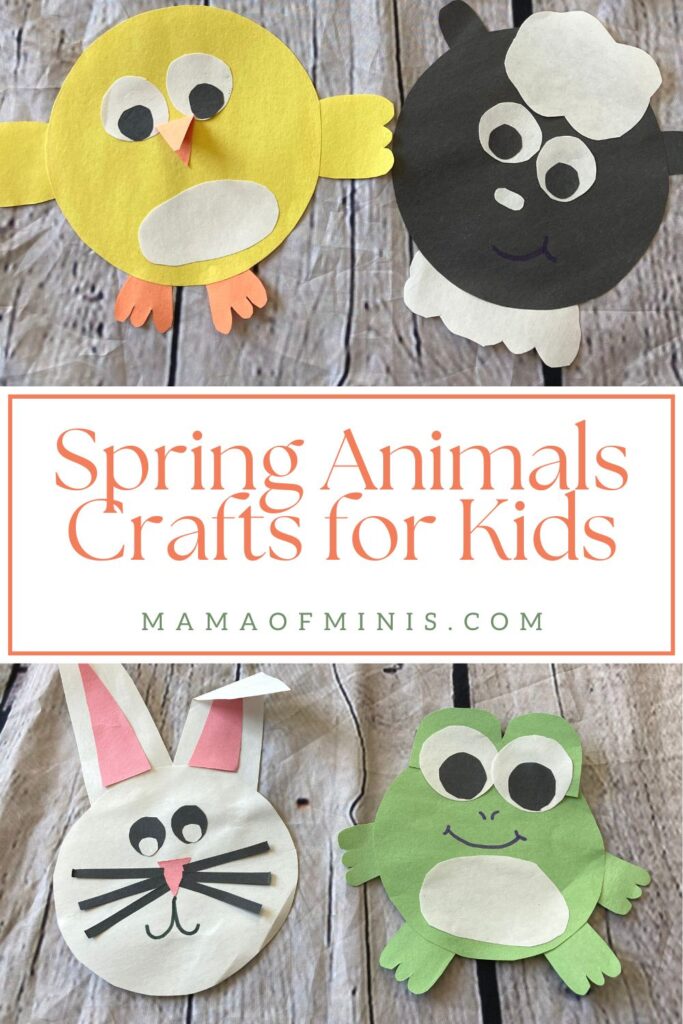
4 Cute and Easy Spring Animal Crafts for Kids
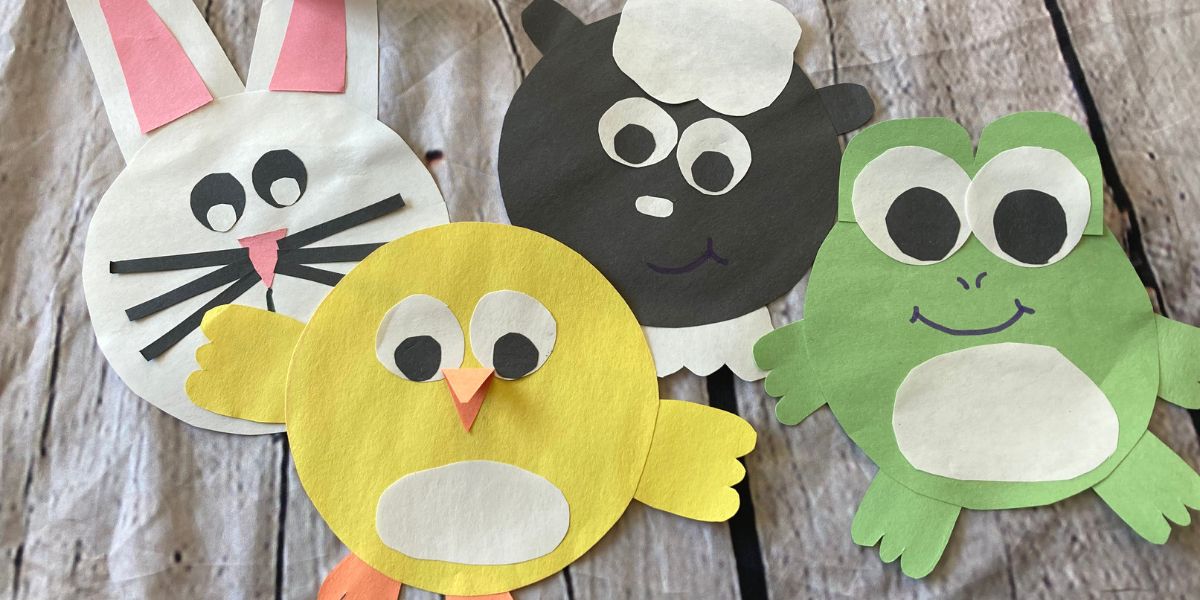
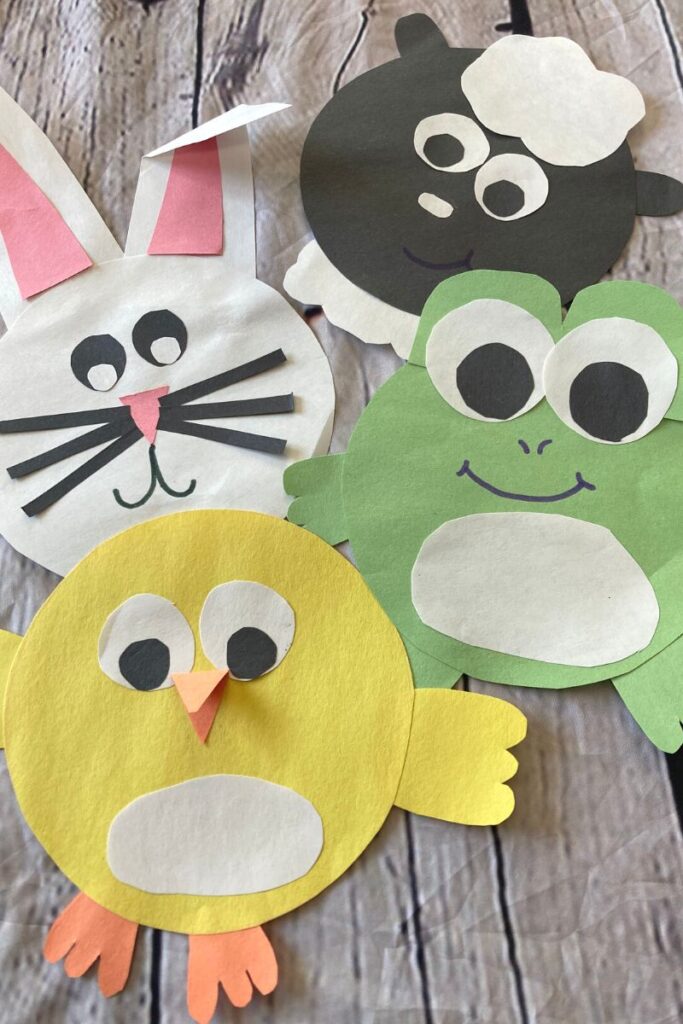
These simple and fun spring animal crafts for kids are the perfect paper crafts for preschool, kindergarten, and grade school-aged children. Includes directions to make frog, sheep, chick, and bunny crafts.
These spring animal crafts make the perfect Easter animal crafts, a unit on animals that come out in the spring, or for learning about life cycles. Make these crafts for children when learning about spring weather, baby animals, and more.
You can choose to make and focus on one of these spring animal crafts, cut out all of the pieces, and allow children to choose which one they like, or even make them all. They look great individually, as decorations, or all glued onto a piece of construction paper for a craft that has multiple spring animals.
For other fun animal-themed crafts, check out these farm animal crafts for kids or these ocean animal crafts for kids as well.
Spring Animal Crafts Tips for Success
*To make these fun baby animal crafts, you will need construction paper, scissors, a glue stick, and a marker or crayon. You may also need a bowl to use as a tracer, but this is optional.
*For these crafts (as well as many of the other animal crafts you can find on my site), you will need to start with a circle body as a base. I like to use a kid’s size bowl to make the body circle. Trace around the bowl with a pencil and cut the circle shapes out.
*For the rest of the pieces for this craft, you can draw the needed shapes onto construction paper and cut them out. If you are working with older children, you can instruct them on the shapes to draw and cut out.
*If working with younger children, you can draw the shapes ahead of time and allow them to cut them out, or you can draw and cut out all of the shapes and simply have the children glue them all together.
*When making these cute crafts you can choose to make one or make all of them. We made all of them in about 20 minutes total. Depending on the age of the children that you make them with, it may take a little more or less time.
*We love to show children our examples and have them try to match up where the pieces go as best as possible. Younger children may not put the pieces in exactly the right spot, but that makes them more unique and a true testament to what they can do at their current age.
Spring Animal Crafts for Kids
Materials
- Construction Paper
- Scissors
- Glue Stick
- Marker/writing utensil
- Plastic bowl to use as a tracer (optional)
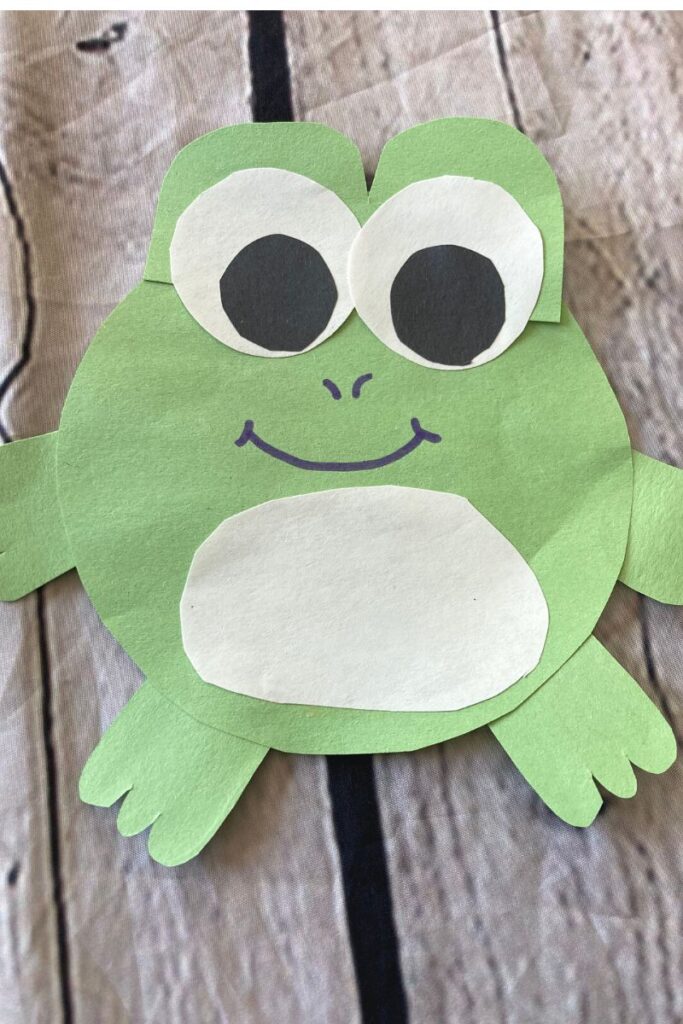
Spring Frog Craft Directions
1. Trace a large circle onto a piece of green paper for the frog’s body and cut it out.
2. Cut out a green filled-in letter m shape for the top of the frog’s head where the eyes will go and glue it onto the top of the circle.
3. Cut out four feet-shaped pieces from green paper and glue them to the sides and bottom of the frog’s body to make both the arms and legs.
4. Cut out a large white oval and glue it near the bottom of the frog’s body to make the stomach.
5. Cut out two large white circles for the eyes and glue them into the filled-in spots on the letter m shape.
6. Cut out two smaller black circles and glue them into the whites of the frog’s eyes.
7. Draw on two nostrils and a smiling mouth using a crayon or marker just above the stomach.
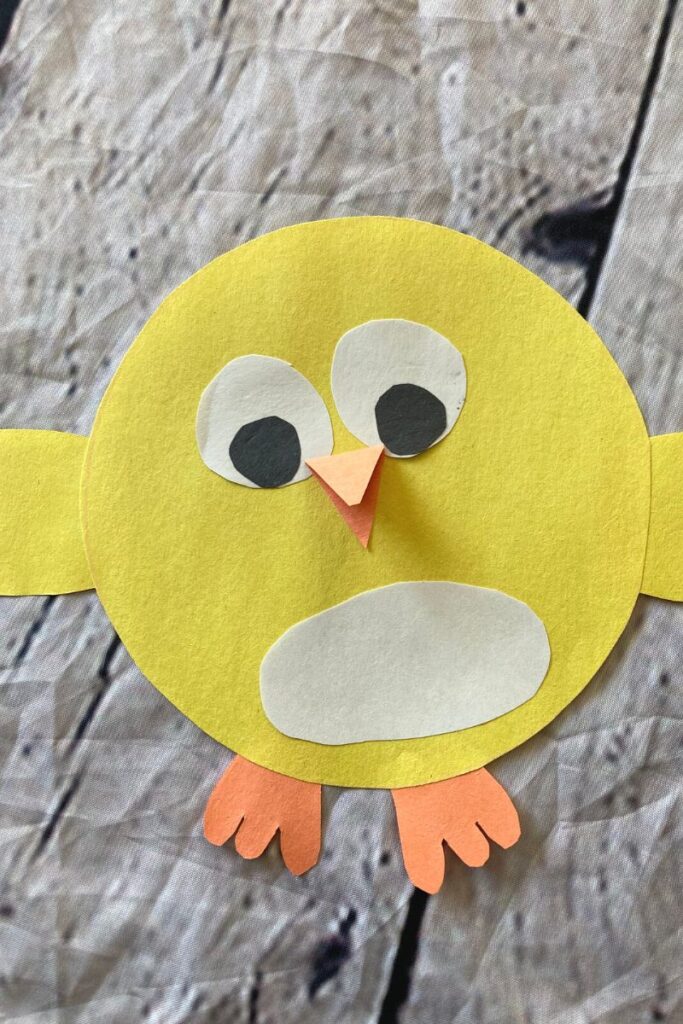
Spring Chick Craft Directions
1. Trace a circle onto a piece of yellow paper for the chick’s body and cut it out.
2. Cut out a large white oval for the chick’s stomach and glue it onto the bottom of the chick’s body.
3. Cut out two small white circles for the chick’s eyes and glue them towards the top of the body.
4. Cut out two smaller black circles and glue them to the insides of the white circles for the eyes.
5. Cut out two wing-shaped pieces from yellow construction paper and glue one to each side of the chick.
6. Cut out two small orange feet-shaped pieces and glue them to the bottom of the chick.
7. Cut out a diamond shape from orange paper. Fold it in half and glue the back half to the chick’ ‘s body right under the eyes. This will make the beak.
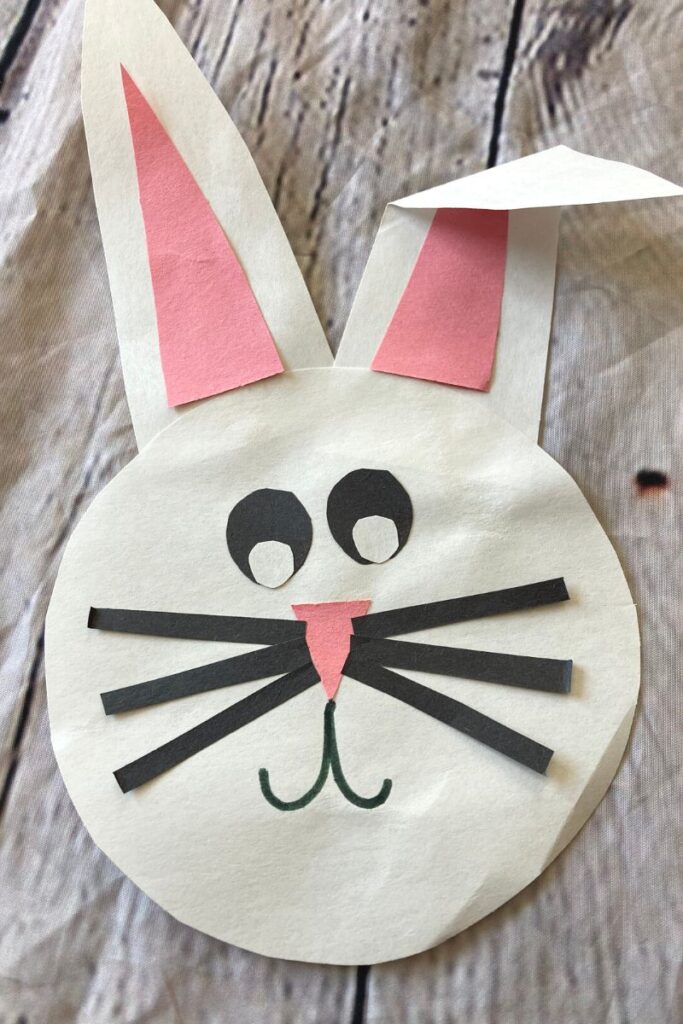
Spring Bunny Craft
1. Trace a circle onto a piece of white paper for the bunny’s head and cut it out.
2. Cut out two large thin triangles for the bunny’s ears and glue them to the back of the head.
3. Cut out two smaller pink triangles and glue them to the insides of the bunny’s ears.
4. Cut out a small pink triangle and glue it to the middle of the bunny’s head for its nose.
5. Cut out two medium-sized black circles for the bunny’s eyes and glue them above the nose.
6. Cut out two smaller white circles and glue them to the insides of the bunny’s black eyes.
7. Cut out 6 thin black rectangles for the bunny’s whiskers and glue three to each side of the nose.
8. Using a black marker, draw a w shape for the bunny’s mouth.
9. Fold one of the ears down and to the side to complete the bunny.
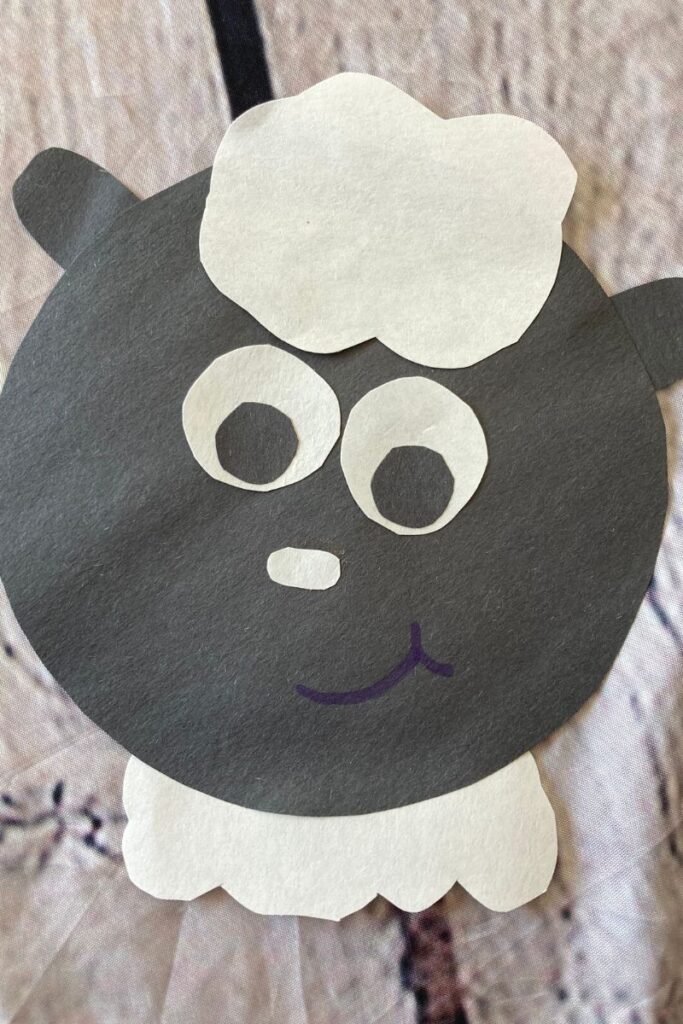
Spring Sheep Craft
1. Cut and trace a large circle out of black paper for the sheep’s head.
2. Cut out a small white cloud shape for the fur on top of the sheep’s head and glue it to the head shape.
3. Cut out a long white cloud shape and glue it to the bottom of the back of the sheep’s head.
4. Cut out two small black ovals for the sheep’s ears and glue them to the top of the sheep’s head.
5. Cut out two medium-sized white circles for the eyes and glue them onto the sheep’s head.
6. Cut out two smaller black circles and glue them to the insides of the whites of the eyes.
7. Cut out a small white oval for the sheep’s nose and glue it underneath the eyes.
8. Draw a smile using a black pen or markers.
This post may contain affiliate links. I may earn a small commission from qualifying purchases at no extra cost to you. We were gifted an Artkive Box experience for the purpose of this sponsored post. As always, all opinions and recommendations are my own.
Looking for a Way to Store All Your Kids’ Seasonal Crafts?
These spring animal crafts make the cutest spring crafts for kids. Make them at school or at home and save them for a fun spring keepsake. Kids will love making the fun and sweet animals.
But if your house is anything like ours, those adorable crafts start to pile up quickly! With four kids in our home, we end up with a ton of artwork and seasonal crafts throughout the year.
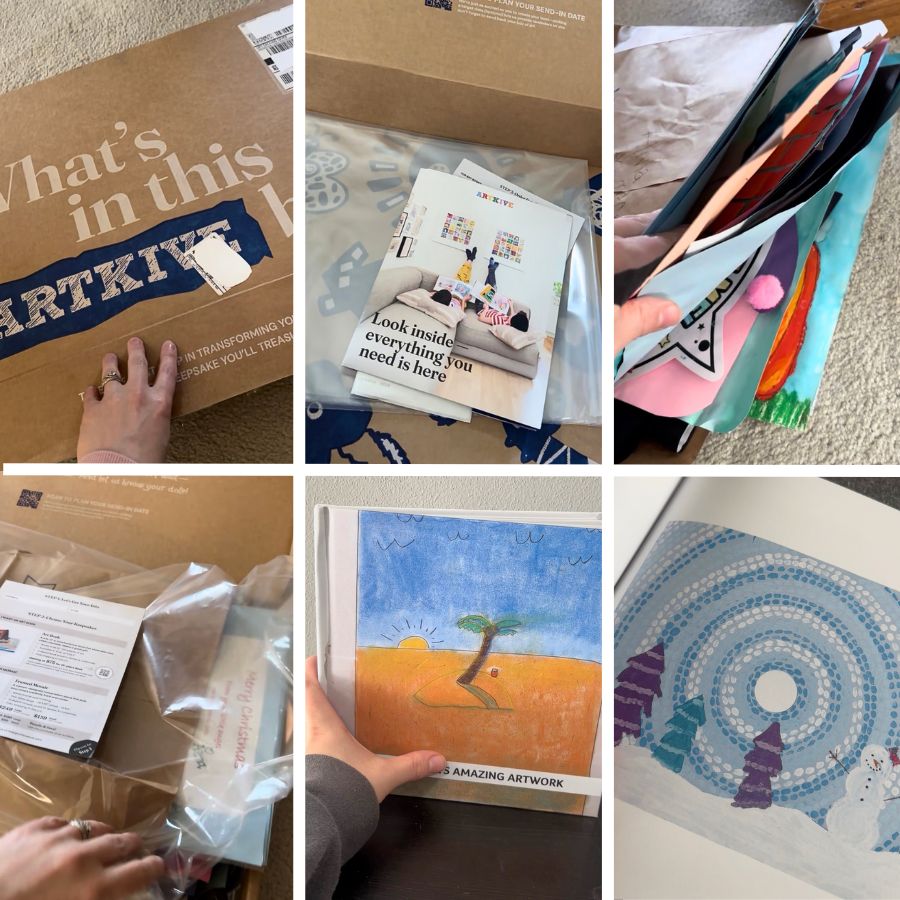
If you love saving your kids’ creations but don’t want stacks of papers and crafts taking over your house, I recently found a really fun solution called Artkive.
Artkive is a company in which you can preserve your child’s artwork in a fun picture book or wall picture for display. They will send you a large box in the mail. Then you package up your artwork in organized piles and send it back in the box.
They will photograph and send you the proof to review (and edit if you desire). Then you order the book, and it comes straight to your house. You can choose for them to send your artwork back or recycle it once it is done.
It is such an awesome way to store and view your child’s artwork and minimize mess and clutter. We love paging through our Artkive book together and showing it to all our friends and family members!
If you want to learn more about Artkive books and the process, check it out here: Artkive
More Fun Spring Crafts and Activities
Check out some more of our favorite spring crafts and activities below:
- Paper Plate Frog Craft – Make a fun paper plate frog craft that goes perfectly on its own or with the popular Froggy books by Jonathan London.
- Paper Strip Chick – Make the cutest paper strip chicks that are perfect for Easter or for learning about baby animals and baby chicks.
- Paper Plate Lamb Craft – Make an adorable lamb craft using a paper plate and cotton balls. So cute and fluffy and perfect for spring.