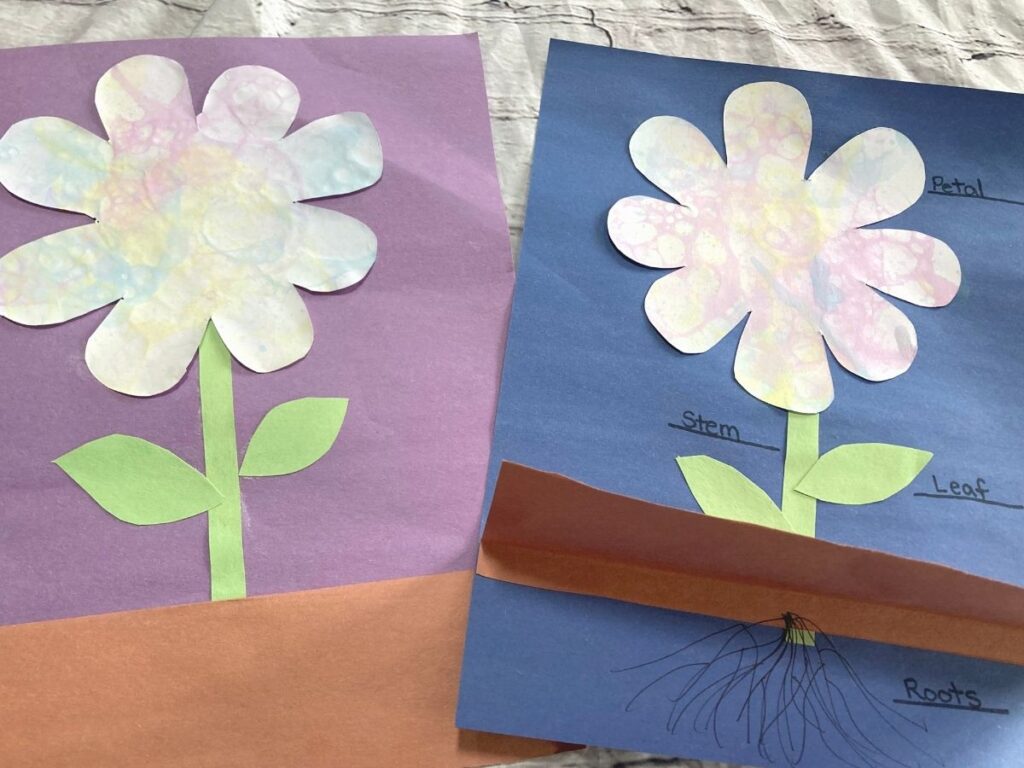
Parts of a Flower Craft for Kids
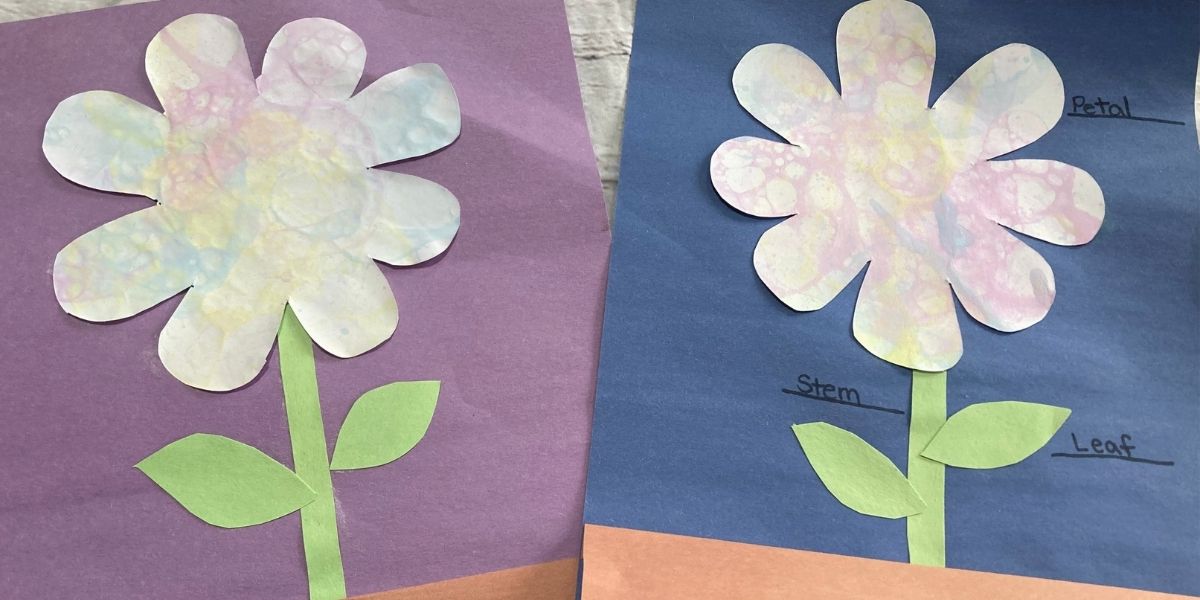
This free parts of a flower craft for kids of all ages teaches children the different parts of a flower in an interactive way. Children can cut out and put together a paper flower craft and label the parts of the flower.
For this spring flower craft, you will need construction paper, a glue stick, scissors, and an optional paid template from teacherspayteachers. If you choose not to use the template you can free-hand draw the parts of the flower and cut them out.
If creating this parts of a flower craft for kindergarten or preschool-age children you may need to help them cut out the pieces and spell or write the words on the paper for them. Older children will be able to do these jobs more independently.
You can choose to use a solid piece of colored paper for the flower part or you can use one from this fun bubble painting craft.
Parts of a Flower Craft Tips for Success
If completing this flower project with younger children (preschoolers, toddlers, age, etc…) you may need to help them draw and cut out the pieces of the flower ahead of time.
You may also want to skip writing or gluing the words next to each part of the flower depending on the age of the children you are completing the craft with.
With older preschoolers and kindergarteners you can start to work on matching the beginning sound and/or writing skills when adding on your labels.
Parts of a Flower Craft for Kids
Materials
- Bubble painted paper (optional)
- Construction paper in different colors
- Scissors
- Glue stick
- Black or brown pen/marker/crayon
Spring Flower Craft for Kids Directions:
- Draw a flower or purchase and print out the flower template on construction paper color of choice (or bubble painted paper which you can find the directions for here).
- Draw, color, or print out the leaves and stem on green paper and cut out the bottom 1/4 of a landscape-facing brown piece of paper for the dirt part of the project.
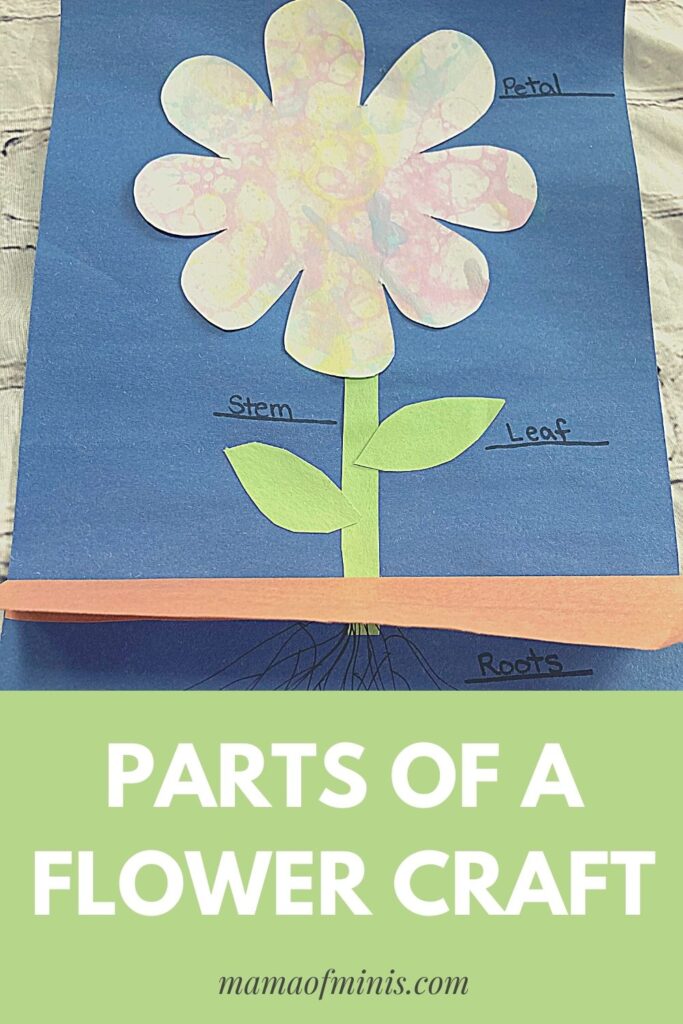
- Fold and put glue on the top 1/2 inch of the brown paper and glue to the bottom of a construction paper background piece of choice (see completed image to see what this looks like). Your brown paper should lift up so you are able to see underneath.
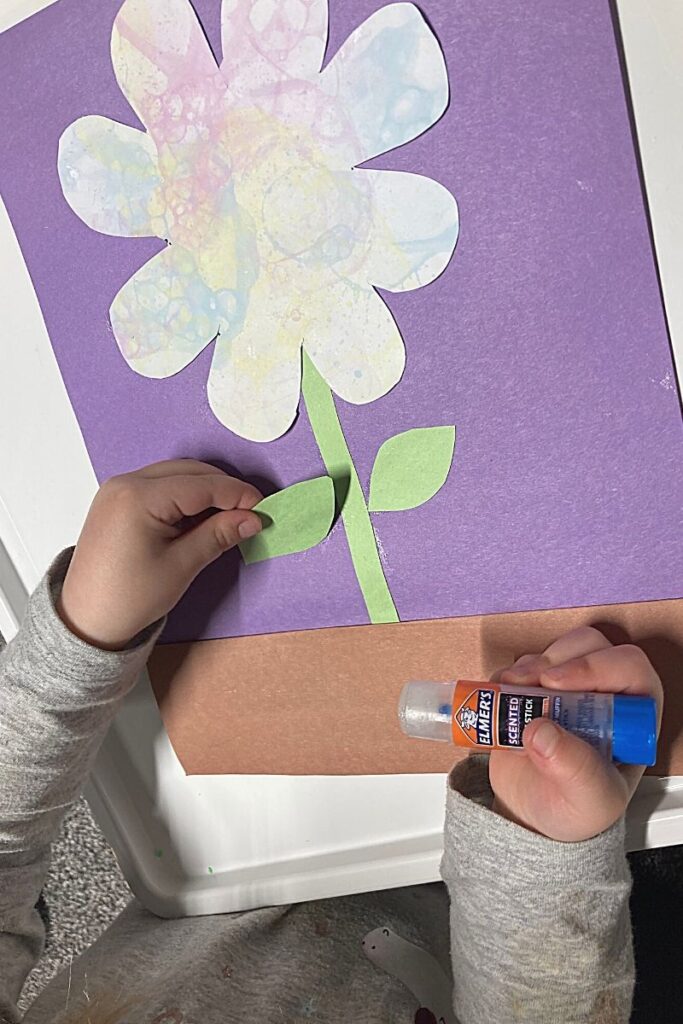
- Cut out and glue on a 1/4 inch wide strip of green paper for the stem. Glue so it is touching the brown paper and looks like it is coming out of the dirt.
- Cut out the green leaves and glue them on both sides of the stem.
- Cut out and glue the flower onto the top of the paper.
- Lift up the brown flap and directly underneath the stem draw lines coming out of it so that they look like roots that spread out from the flower.
- If adding labels write the correct names of the parts of the flower next to each part (or print out your own labels or ones found in teacherspayteachers pack).