

How to Make Homemade Baby Food
When starting your little ones on solid food for the first time you may have a lot of questions. You might wonder if you are introducing foods correctly, making the best choices for your little ones, and creating good eating habits.
There is a lot of information about baby-led weaning, store-bought baby purees, and homemade baby food purees. No one way is better than the other. You just need to pick what is right for you and your families.
*Disclaimer – I am not a doctor/pediatrician. I am simply a mom who has been through this route two times and wants to share what worked best for our family and tips/tricks I learned along the way.
For our firstborn, I was working full time as a Kindergarten teacher. I didn’t have a lot of free time on my hands so, in the long run, we ended up buying a lot of the organic food pouches. I started by making a few homemade purees when we first introduced food but it took a long time and my little one wasn’t loving the consistency. I didn’t know how to correctly package and store them and it just seemed like a waste of time and energy for me.
With my second-born, I ended up taking time off of teaching and staying home with my girls. This freed up some of my time so I decided to give making my own homemade baby food purees another go. I am so glad I decided to try it again. I learned a lot of great tips and tricks along the way and things became so much easier. I realized I had the supplies I needed at our house the whole time and figured out how to make and store tons of baby food purees.
I now have a 9-month-old who has a freezer stocked full of delicious purees and I feel good about what I am feeding to my daughter. I am extra thankful we decided to go this route when all the recent studies about metals in some of the popular baby foods came about. We still use some of the pouches here and there (mostly when traveling or eating at our in-law’s house as it is easier for us) but we mostly do a combination of our homemade purees and baby-led weaning when we are at home.
Read on for directions on how to easily make, store, and feed your baby 8 different level 1 purees and 6 different level 2 purees.
What materials work best for making homemade baby food?
When making homemade baby food we found that the following items worked best for us:
1. Immersion blender – This cuts back on the amount of mess made as well as blends the food into the perfect consistency. On our first go at baby food, we used a normal blender but found that the immersion blender works so much better!
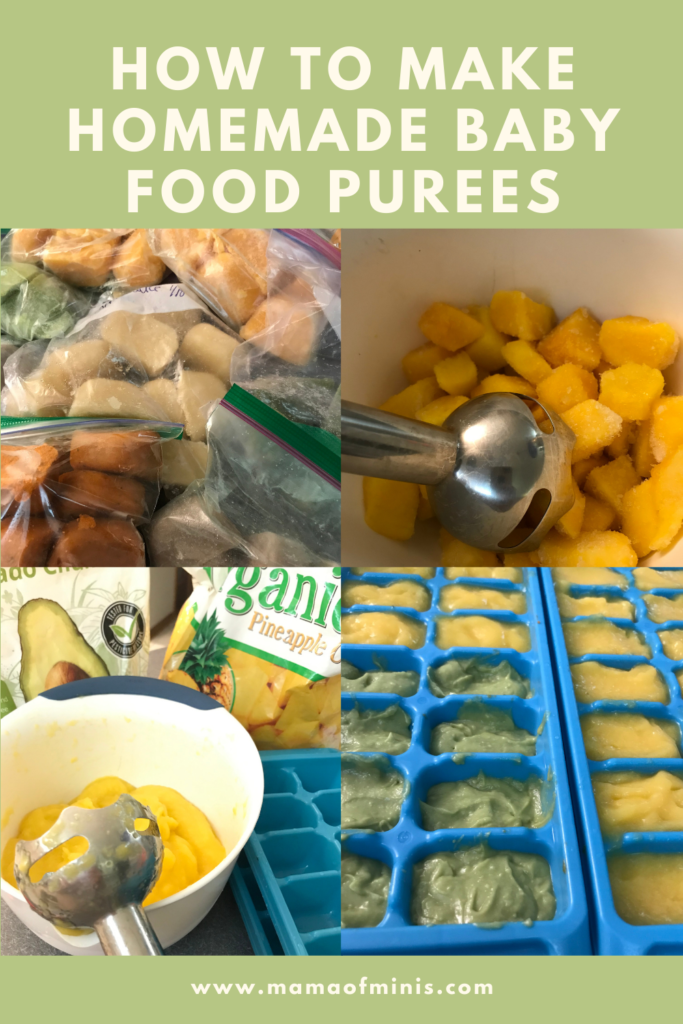
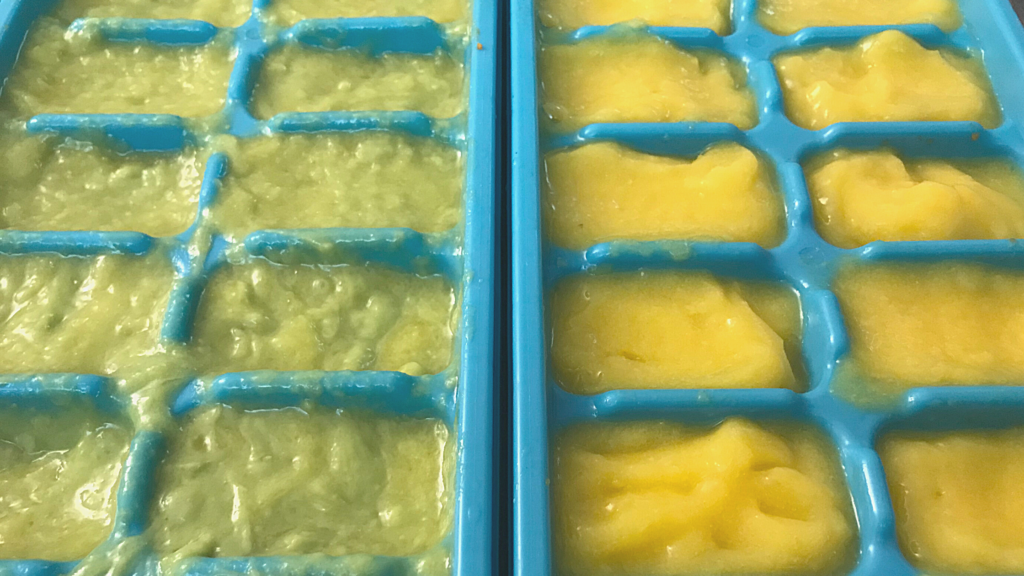
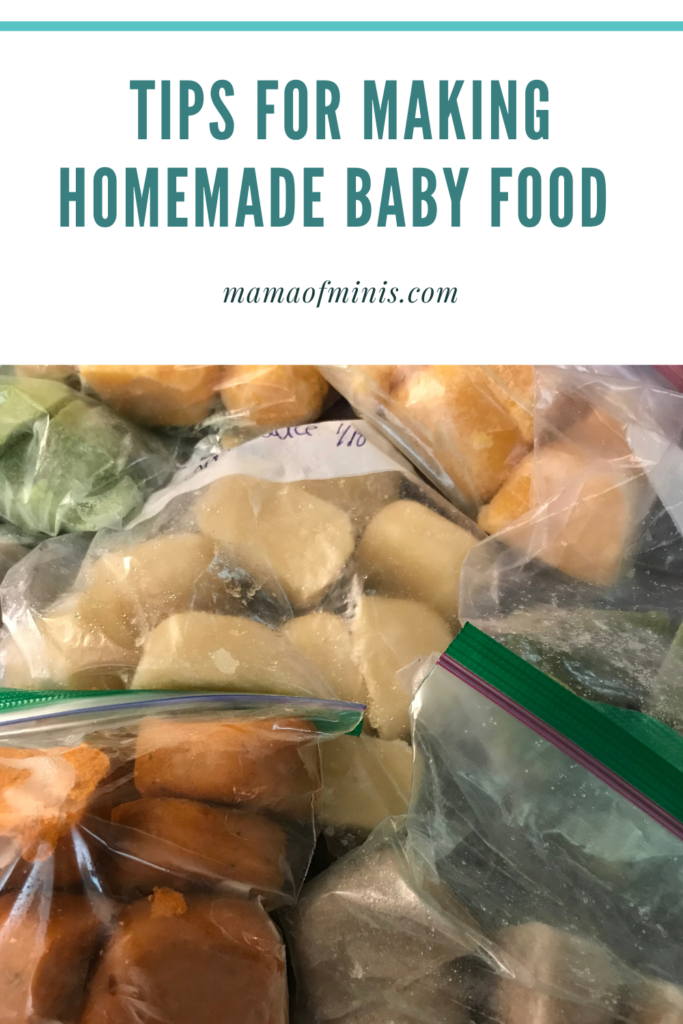
2. Ice cube trays – These are for storing and freezing baby food for future uses. The cubes end up being the perfect size for babies. Once it is frozen you just pop one out, heat it up, and feed it to your baby. So easy!
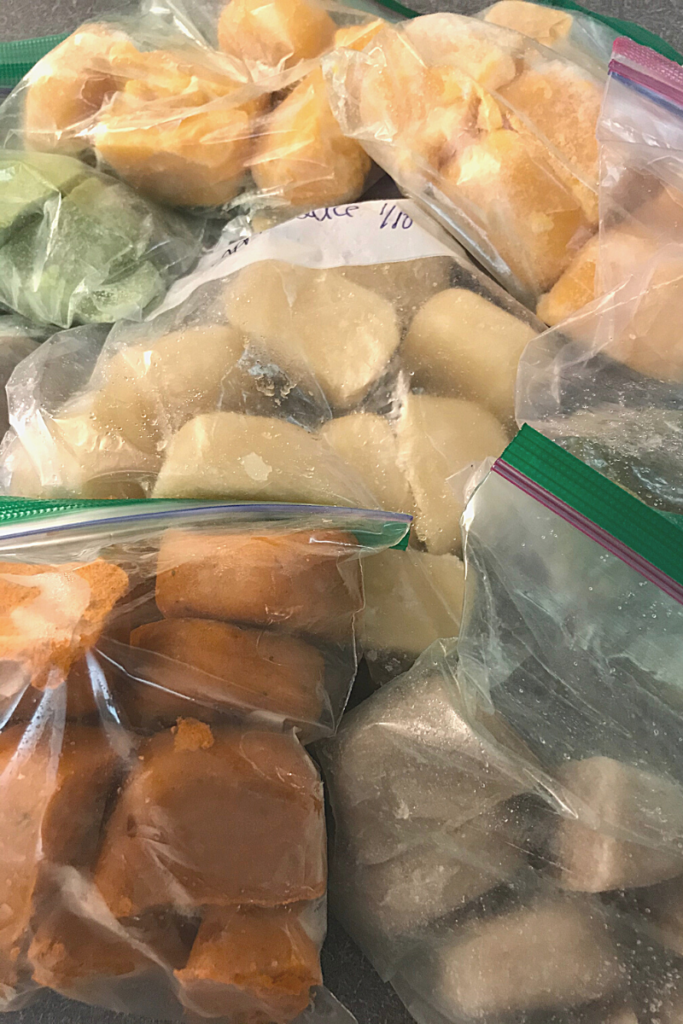
3. Freezer bags – To save room in our kitchen freezer we packaged up a sandwich-size bag of each food and labeled all the bags with the food name and date. Then we combined 4 of these (different kinds) into a gallon-size freezer bag. We put the extra in freezer bags down in the basement and refill the upstairs ones when needed.
4. Pans and Spoons for cooking fruits/vegetables when needed.
5. Frozen and/or fresh organic fruits and vegetables – We chose to use all organic fruits/vegetables to make baby food. The Wellness Resolution has a great article titled “When is Organic Really Worth It?” that explains why we chose to go organic for our homemade baby food.
You can purchase organic fresh fruits/vegetables in season at your local grocery store. You will need to peel and cube them before turning them into food but you will know exactly what is going into the food.
If you want the easier route you can buy organic frozen fruit/vegetables and save a lot of time not having to skin and cube them before blending. Most have no additives and are still an awesome time-saving option (we did a mix of both). Plus if you don’t get around to making it when you’ve planned you can just keep frozen until you can.

Stage 1 Baby Foods
When we started purees with our girls we began by making them thinner in consistency with no chunks. You can add a little breastmilk or water to help thin them out if necessary. The following is a list of our favorite foods when starting purees and tips for making each one.
Green Beans – Wash and cut the tips off the green beans (we love to buy the organic French
beans from Costco as they come ready and are always perfectly picked) Cook the beans until soft. Then put into a bowl with breastmilk, water, or formula and puree with an immersion blender until smooth.
Carrots – Organic baby-cut carrots work great for an easier process. Otherwise, you can buy the whole carrots. Wash, peel, and cut carrots down into smaller pieces. Put them in a saucepan with 1/2 cup of water and cook them until soft. Drain the remaining water and transfer it to a bowl. Add breastmilk, water, or formula, and use an immersion blender to blend until smooth.
Sweet Potatoes – We love our potato cooker for these. Simply wrap potatoes in damp paper towels and put them in the potato cooker. Put in the microwave on the potato setting and cook until soft. Remove the skin from the sweet potato. Add breastmilk, water, or formula and blend until smooth.
Avocados – Make sure avocados are soft to the touch as these work best. Remove from skin and take out pit then cut into pieces and add to bowl. Add breastmilk, formula, or water, and blend until smooth.
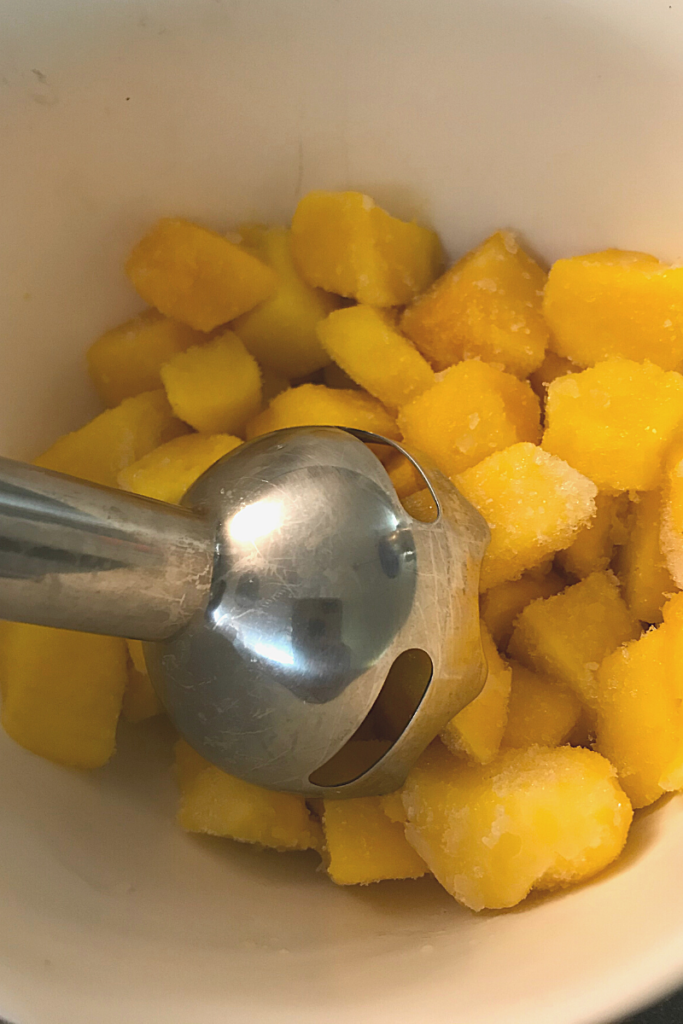
Mangos – If using fresh remove skin and pit and cut into smaller pieces. Add to bowl and blend. You may or may not need water/breastmilk depending on how soft your mango is. If you need to add water/breastmilk be sure to add very slowly so you don’t end up with food that is too runny.
Apples – Wash, slice, and core the apples (no need to remove skin if you don’t want to). Add to saucepan with 1/4 cup water and cook until apple pieces are soft. Drain water and transfer to bowl. Add breastmilk/water/formula and puree until smooth.
Banana – Peel the bananas and add to bowl. Add a small amount of breastmilk and puree until smooth. Bananas are naturally soft so you will not need to pre-cut or cook beforehand.
Pears – Wash, peel, core, and cut pears into smaller pieces. Make sure the pears you are using are soft enough. If the pear is ripe enough you do not need to cook it. If the pear is still a bit hard you will need to cook in a saucepan with 1/4 cup water to soften it first. Once soft add to bowl with a small amount of breastmilk/water/formula and puree until smooth.
How do I store baby food?
Ice cube trays are the perfect way to store baby food easily. We tried and failed to find the perfect storage system for baby food with baby number one. With baby number two someone mentioned using ice cube trays and it has worked perfectly for us.
Once the food is pureed and ready, spoon it into the slots in a standard ice cube tray. Fill to the top of each spot. Once the tray is all full put it in the freezer and freeze until cubes are solid.
Remove each frozen cube from the ice cube tray and put it into a freezer bag. Label each freezer bag with the date and the name of the food.
How long will homemade baby food last?
Food that you’ve made will last for 1-3 months in the freezer. We keep ours in the deep freezer so we tend to still use it towards the end of the range. It still works and is good for our baby at that point but we wouldn’t want to go any longer than 3 months.
Baby food can last 48 hours in the fridge and up to 2 hours left out of the fridge/freezer. Any longer and bacteria could be introduced into it.
*If you feed baby be sure to discard any remaining food when finished. You shouldn’t put it back into the fridge as it could have gotten bacteria on it from the spoon. The nice thing about the ice cubes is that they are usually the perfect serving size and there isn’t usually much leftover when feeding baby one.
How to serve homemade baby food out of the freezer
Using the ice cube method to freeze food makes serving homemade baby food so much easier. When you are ready to feed your baby simply pop the desired amount of cubes out of the freezer, put them in a microwave-safe bowl, and use the defrost setting until they are soft. Then you can spoon-feed your baby with them.
How much should I feed my baby at once?
1 ice cube is equal to 2 tbsp or 1 oz. This is a good amount for a baby just starting solids. When we first chose to start solid we would always defrost one cube at a time.
We started both our girls on stage 1 solids at 4 months as suggested by our pediatrician. Our firstborn wouldn’t even finish one ice cube full at first and that was totally fine. We stopped when she seemed to be done. Our second child loves food and would go through an ice cube full quickly.
From 4-6 months we served one ice cube full of food at a time. From 6-8 months we typically defrosted and served two ice cubes full at a time. From 8-10 months we serve 3 ice cubes full at a time.
It really depends on your baby and what they seem interested in. Our firstborn was never a fan of purees and was a very picky eater. She never ate large portions (and still doesn’t as a 2-year-old). Our second child is currently 9 months old and is the best eater. She LOVES solids and is never full. It seems like no matter how much we give her she can always eat more. Follow your baby’s cues and if they turn away or push the spoon away they are most likely done.
Stage 2 baby foods
Peas – Purchase frozen organic peas. Cook the peas according to the directions. Once peas are cooked through, put in a bowl and add a small amount of water/formula/breastmilk. Mix with an immersion blender until smooth.
Zucchini – Wash, remove skin, and cut zucchini into smaller chunks. Cook with 1/4 cup water in a saucepan until soft. Drain water and add to bowl with a small amount of breastmilk/water/formula and blend until smooth.
Broccoli – Wash broccoli and cut off stems. Steam until soft/mushy. Blend with a small amount of breastmilk/water/formula until smooth.
Peaches – Peel, remove the pit, and cut into cubes (or buy frozen organic to make things easier). Put into blender and blend up until smooth. You may need a very little bit of water/breastmilk if they are not ripe/juicy enough on their own.
Kiwi – Peel or remove skin and cut into smaller chunks. Add to bowl and blend with an immersion blender until smooth. You may need just a small amount of water/breastmilk to help them become more smooth.
Blueberry – Was blueberries and add to bowl. Add water and blend until smooth. You may need to add additional water as you are going to ensure that they puree smooth without any pieces of skin left.
Mixes – You can use two to three of stage 1 or stage 2 foods together to make a whole assortment of purees. Some of our favorites include banana blueberry, pear peas, mango peach, and banana avocado. You can either puree them together while making them or you can also do it by mixing them once defrosted. Simply choose one ice cube of each kind you’d like. Defrost them in the same bowl and stir them together to make mixes.
Extra mix-ins – Pediatricians have been suggesting you start exposing your littles to peanut butter earlier rather than later. One great way to do this is to stir a small spoonful of peanut butter into their baby food purees before serving. Our favorites to do this with include bananas and apples. We started doing this around 6 months with both our babies and they love it!
Introducing solids to your baby for the first time is a new and exciting thing. We have loved making solid purees for our baby this time around. For some families, it isn’t practical and they don’t have time, resources, or desire to make homemade baby food and that is great too. We went that way with our first sweet girl and it worked great for us then. Do whatever works best for you and your family at the time.
Some families also choose to go a different route and do baby-led weaning. While we are big fans of purees in this house we’ve also paired them with just a little bit of baby-led weaning.
We started giving our girls spears of super soft foods like avocado and banana around 6 months. We put them on their trays and just let them explore. Our picky eater wasn’t as big of a fan but our secondborn loved her food this way as well. All babies are different and you just have to try and see what they like.
As mentioned above, I am not a pediatrician and do not have any training in baby nutrition. I am just a mom who wanted to share our experiences with baby food and feeding our two sweet girls. This is what we found works best for us and I hope it works for you as well! Good luck and enjoy introducing your babies to solids!
For additional tips for first-time moms be sure to also check out these baby registry item suggestions. It includes a handy list of some must-have items that make life as a Mom so much easier.


Love the idea of freezing in ice cube trays!
Thanks so much Kaitlin! I tried it a different way with my first and didn’t like it nearly as much as the ice cube trays. It works great!
great article. Homemade food is the best thing we can feed with our children
Thanks so much Farwa! Yes it is great for them!
So thorough and helpful to new mamas! Thanks for the great tips and for this post!
Thanks so much Lisa!
This is such a great guide! I made my sons baby food, and I really enjoyed it. It’s nice to know exactly what is in the food!
Yes, that is a great benefit to making your Baby’s food! Thanks Rachel!
Such a helpful post! I made my baby’s food also and went through trial and error for storage so I wish I saw a post like this beforehand!
Thanks Karissa! Yes we went through a lot of trial and error to find out what worked best!
This is extremely helpful and informative. I’ll have to send this to my sister for my baby niece! Thanks for sharing!!
Thanks so much Meg! I hope she finds some good tips!