

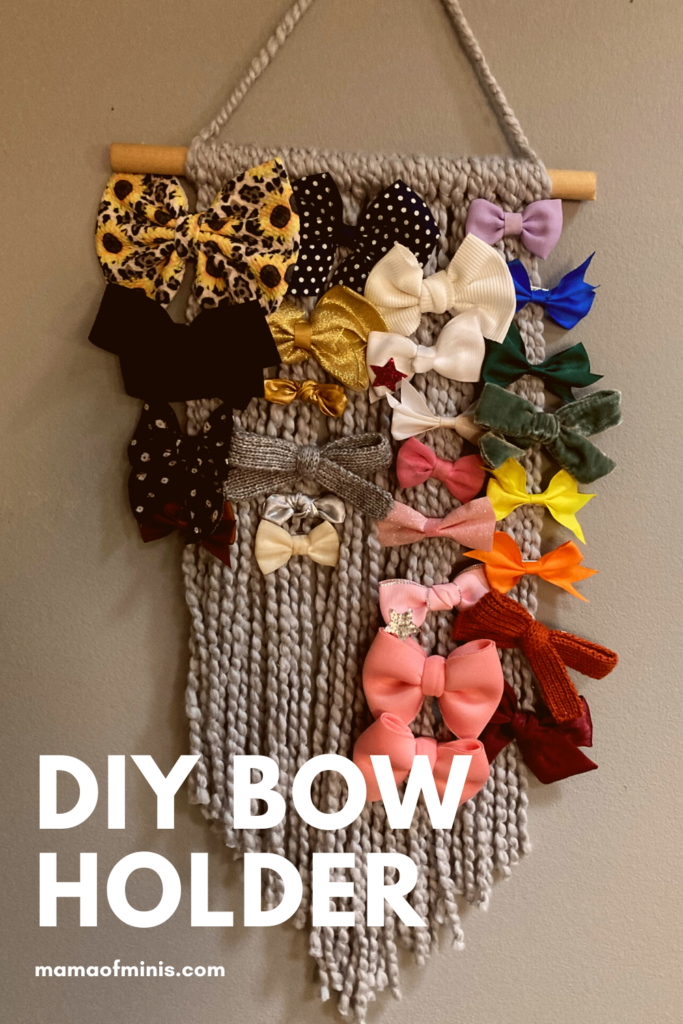
This no sew DIY bow holder is so simple and the perfect addition to your child or baby’s nursery or bedroom. It is made with two (or three) simple items and can be made by anyone.
This DIY hair bow holder gives directions on how to make the cutest hair bow holder. It will only take 30 minutes tops from start to finish and is super simple to hang up. It looks almost like a macrame hairbow holder and is the perfect decoration to add to a baby girl’s room or nursery.
Scroll down for step by step directions on how to make this DIY macrame hair bow holder.
How Do You Store Bows?
There are many different ways to store hairbows. Our favorite way is to make a DIY hair bow holder using a dowel and yarn. You can also keep them in a bin or drawer, or purchase a holder specifically for hair bows from a local store or online.
We have a bow obsession at our house. I have two daughters and both need hair bows or headbands to match every outfit. We have so many different colored hair bows and headbands so we needed a no sew and inexpensive storage solution for them and this one is the perfect one.
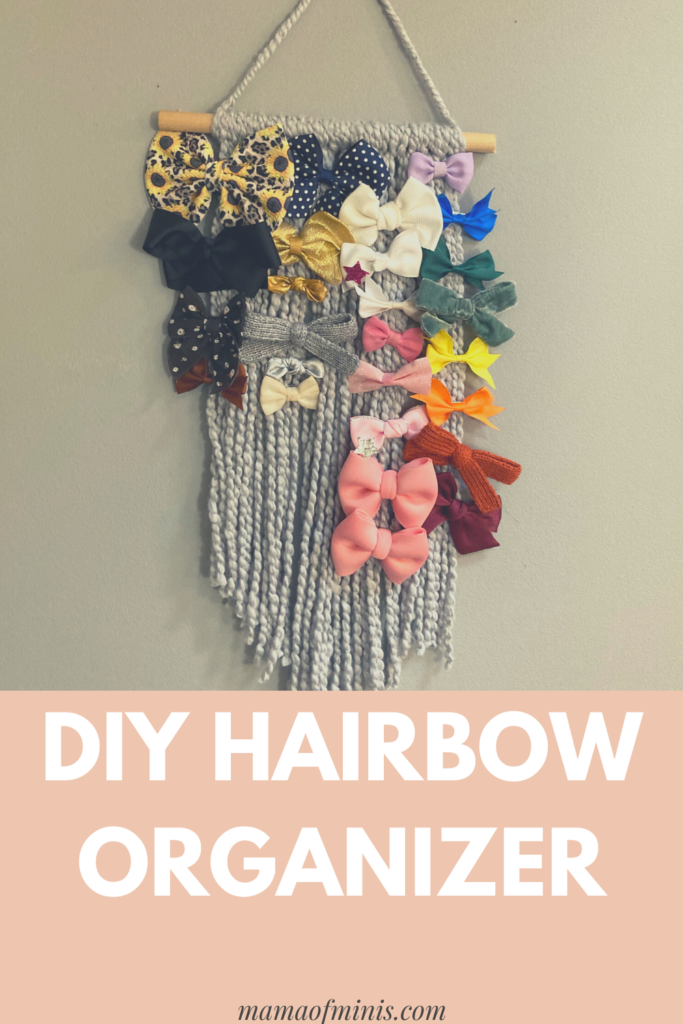
We love to organize our hair bows by color on this DIY hair bow organizer. It helps to add a pop of color to our baby girl’s room and looks great hanging on the wall.
What Size Bow Holder Do You Need?
The bow holder shown in the photos is 12″ wide with the longest yarn hanging in the middle being about 24″ long.
However, I didn’t add exact measurements to the directions as you can make your bow organizer the size that you desire. We have an extensive bow collection and made a much larger one after making our original bow holder. You can make it larger by using a larger wooden dowel and more yarn.
*The great thing about this DIY baby girl’s hair bow holder is that it is totally customizable. You can attach fake flowers with hot glue, use different colored ribbons, paint your wooden dowel, and attach any other details. This way it makes the perfect bow organizer for your baby’s nursery or a girl’s bedroom decor.
How to Make a No Sew DIY Hair Bow Holder
Materials
- Wooden dowel (photographed one is roughly 12″)
- Ball of yarn of choice (A thicker yarn looks better once completed)
- Acrylic paint (optional)
Directions:
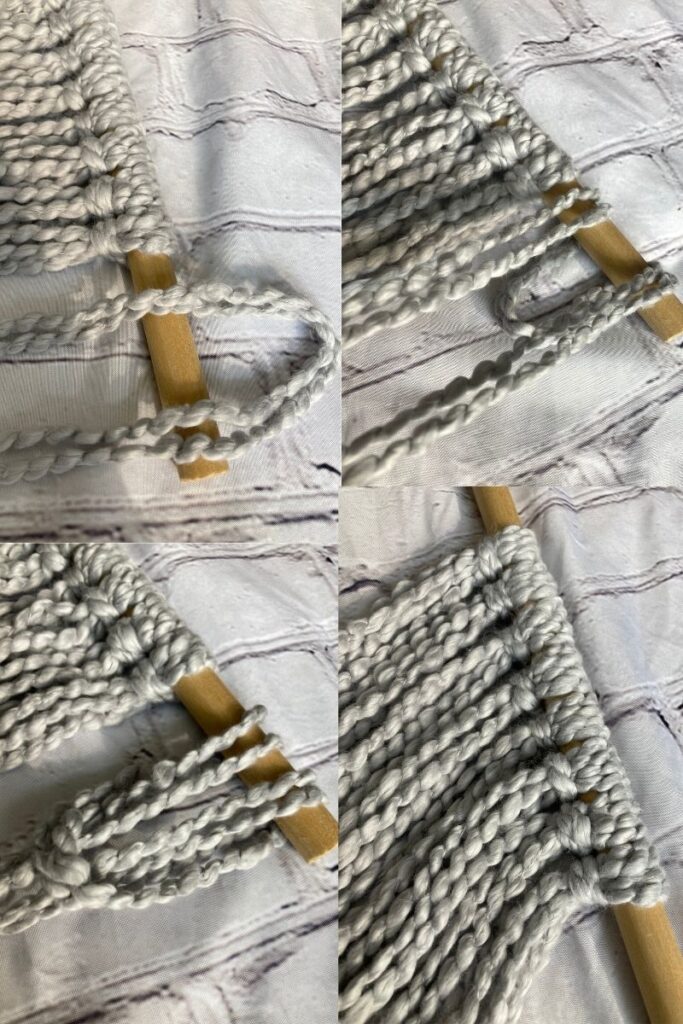
- If desired, paint your wooden dowel a color of your choice and let it dry.
- Cut lengths of rope about 48″ long. Layer two of them on top of each other and fold them in half.
- Leaving about an inch of space on one side of the dowel, attach your first two pieces of the layered yarn with a lark’s head knot.
- Continue doing this process down the dowel until you have about an inch of space remaining on the other side. Make sure there is no empty space in between knots along the dowel. They should be touching.
- Using craft scissors, cut the fabric into a V shape. To do this, start about two inches up from the bottom of the rope on one side and cut down towards the middle at a diagonal. Do this on the other side as well.
- Add a piece of rope to hang by taking a doubled-up piece of rope and twisting it around itself. Tie onto each side of the dowel and cut the ends so you can’t see them anymore.
This no sew diy hair bow holder is the perfect addition to your baby’s nursery. It makes a great personalized gift for a baby shower. For other ideas of what to get for baby be sure to also check out this baby registry item ideas list.

so cute! I remember making something similar like this before, keeps my hair ties organize
Thank you so much!
Excellent idea! We always have extra yarn, but I never thought to use it in this way. This is perfect!
Thank you so much! Yes, it is so easy and inexpensive. Extra yarn works great for this project!
This is such a cute and fun idea.
Thank you so much!